
Installation Details (OLD)
Hardware
Fixed Business applications are best with the High Performance Starlink
-
High Performance: Designed for power user, business, and enterprise applications. It allows better speeds at high temperatures, can connect to more satellites, and is more resilient to extreme environments.
-
More information here
Maritime & Mobility applications are best with the Flat High Performance Starlink and a Wedge Mount for installation, which is best for mobility applications
- Flat High Performance: Designed for mobility applications and challenging environments. With a wide field of view and enhanced GPS capabilities, it can connect to more satellites, allowing for consistent connectivity while on the go. The hardware is designed for a permanent installation and is more resilient to extreme environments. Currently the only designated dish for in-motion use in approved countries.
- See more details here
STARLINK APP
Download the Starlink app to manage your account, check for obstructions, browse the shop, and set up your kit.

Quick Start Guide
Step 1 - Find a Location
Use the app to find the set up location that will deliver the best service. Your Starlink needs a clear view of the sky so it can stay connected with satellites as they move overhead. Objects that obstruct the connection between your Starlink and the satellite, such as a tree branch, pole, or roof, will cause service interruptions.


Step 2 - Unbox and Plug in
Your Starlink Kit will arrive with everything you need to get online in minutes including your Starlink, WiFi router, cables and base. See the Starlink Specification for more details on what’s in the box.
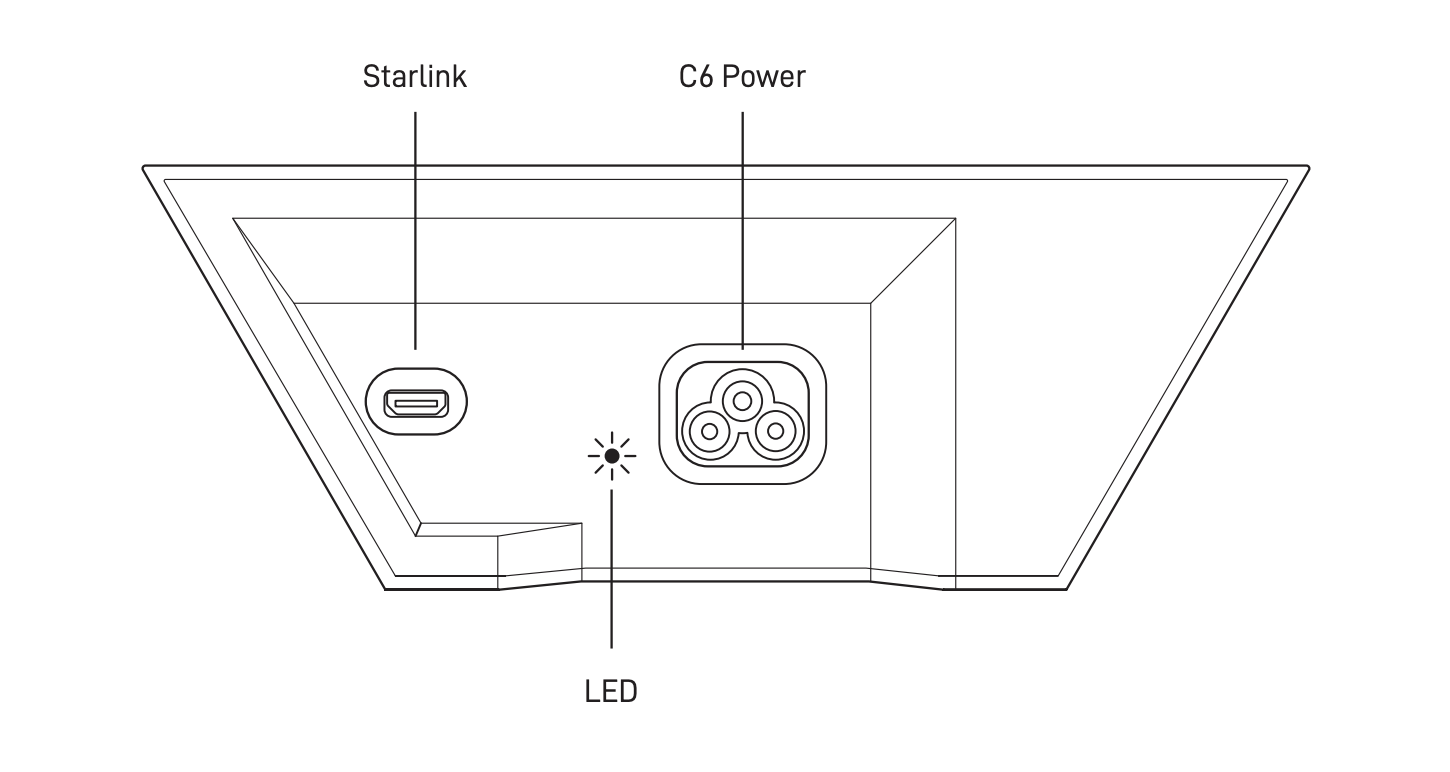
- Connect cable to Starlink
Power Supply outlets:
- Set Starlink into base (in the location you found above)
- Connect cables to the router and plug into power
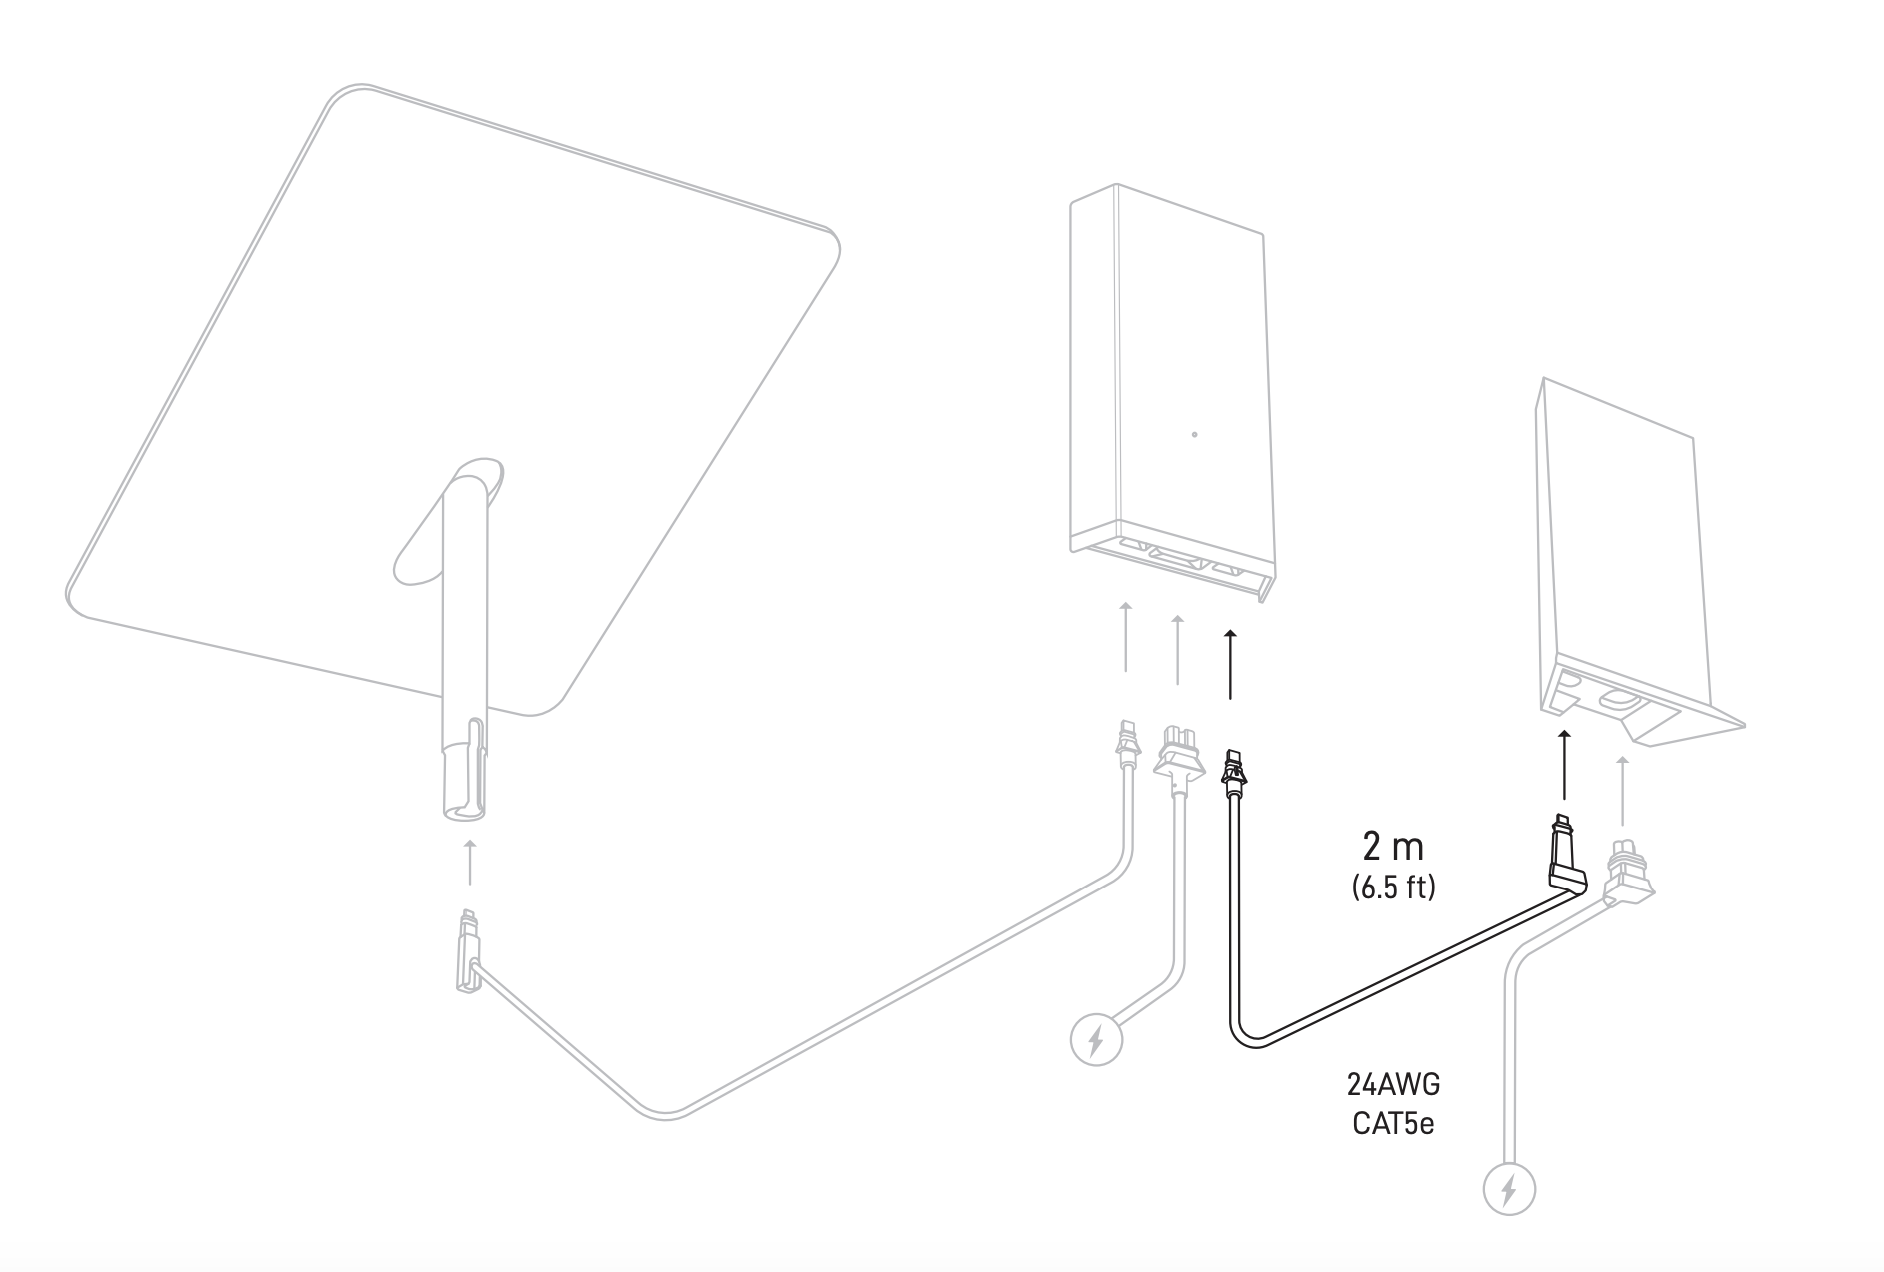
Router outlets:
- Starlink will automatically level itself to search for satellites overhead. Do not attempt to manually adjust your Starlink.
- After a few minutes, Starlink will make an initial connection to the Starlink constellation and tilt to the optimum angle for satellite coverage.
Step 3 - Connect to WiFi
- Stand close to the router, open the Starlink app, and tap ‘Start Setup’.
- This will guide you through the setup and prompt with WiFi configuration steps like setting a Network name and password.
- No Starlink app? Find and connect to the STARLINK network in your device’s WiFi settings.
- Confirm you are connected by navigating to a website, watching a video, or running a speed test from the app while connected to Starlink. You will see an ONLINE status on the main screen of the app.
- We recommend using the Starlink router for initial setup confirmation. If using a third party router, you will need an ethernet adapter. See the WiFi section for additional guidance
Step 4 - Test Your Connection
After a few hours of connection, the Starlink app has had time to collect more data.
- Starlink Stats: From the Starlink app in the “Statistics” section, or by typing dishy.Starlink.com into any web browser, you can check statistics like speed, uptime, latency, outages, and alerts while connected to the Starlink router.
- Obstructions: Check to see where you may have obstructions causing intermittent service.
- WiFi Range: View the signal strength of each connected device from the Network screen, use the Range tool to test WiFi signal throughout your home, and run a speed test.
- Support: If you are having issues with setup, review the guidance in the Troubleshooting and Setup sections in Support. It may take up to 20 minutes for Starlink to connect.
Video
Here is a quick overview of Starlink installation for the Standard hardware:
FAQs
How do I install Starlink?
Starlink kits are designed for self-installation. You can find the installation guide here.
Are there authorized Starlink installers?
Currently, we do not have any authorized / recommended installers in the US. However, customers have found success using local contractors with experience in roof and external wall installation.
My installation requires longer cables. What do I do?
Longer cables are available for purchase in the Starlink Shop. Cable options vary by dish type.
I am getting less than 50Mbps in download speed, but expecting more. What is going on?
There are several factors that can lead to slow speeds, such as poor router strength, obstructions, and specific device limitations. Consider confirming that your dish has an unobstructed view of the sky and that your router is in a central position. Both of these issues can be identified in the app.
If your computer or network device has an older WiFi interface, speed will be limited on that device. Some older ethernet ports only support 100 Mbps. Check your equipment, or try a different device.
If you have confirmed your setup is nominal, please reach out to customer support about your slow speeds.
Updated 14 days ago