
Maritime / Mobility Install Guide - Performance (Gen 3)
Detailed guidelines for mobile installations of the latest Starlink Performance terminal.
Read First: Key Considerations for a Successful Install
-
Minimize Obstructions: Each Starlink should have a clear view of the sky 20° elevation above the horizon, 360° around the azimuth. You may need to raise the antennas on a pole/pedestal to get a clear view of the sky & good service. If you have obstructions > 20° elevation in any direction, the connection may be occasionally interrupted.
-
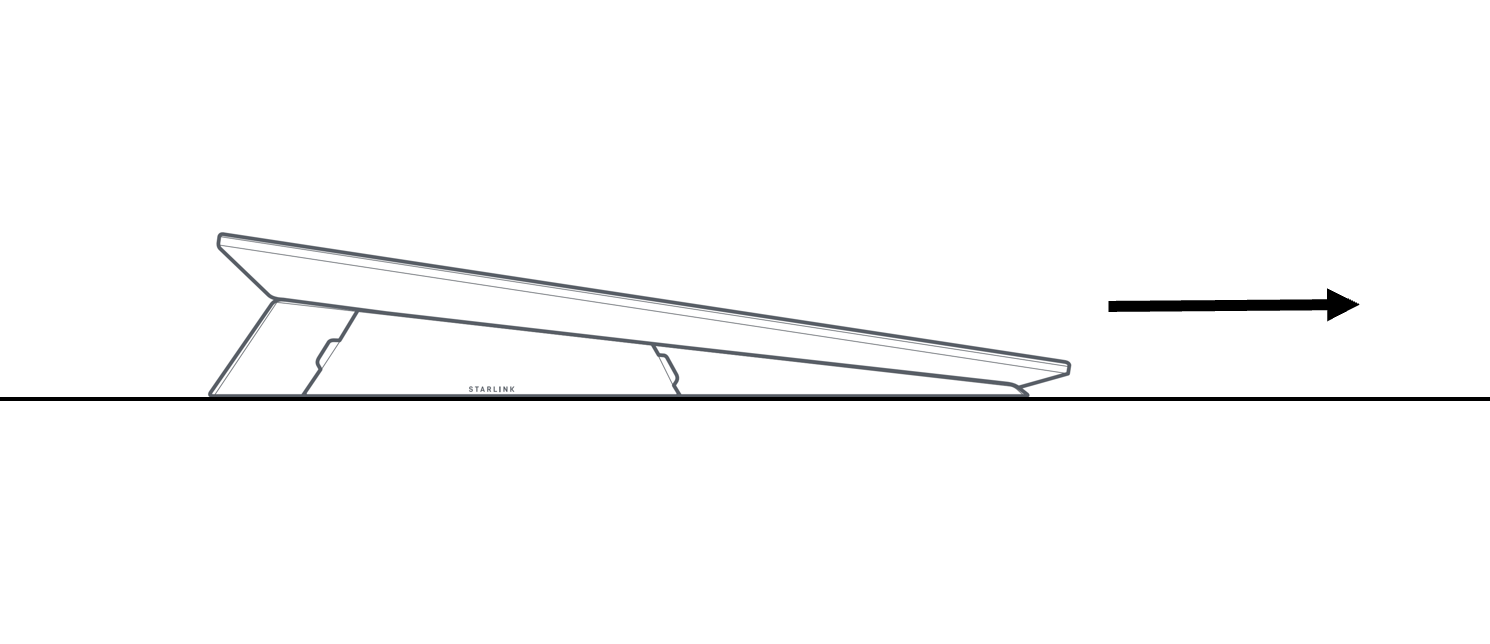
Orientation of the Mounts: The wedge mount is tilted 8° to facilitate water runoff. Ideally, the antennas should be tilted in the direction with the fewest obstructions. Be sure to use a removable thread locker on all threaded fasteners.
-

Orientation of the Dish & Power Supply Unit: Dish & PSU should be set up so that connectors are facing down or to the side. This is to avoid water collecting or sitting around the seal.
-
Cables: The maximum distance from the dish to the power supply is 50m (150'). The maximum total distance from the dish to the network equipment (passing through the power supply) is 100m (300'). The minimum bend radius of the cable is 5cm (2"). Sharp kinks in the ethernet cables can lower the throughput speed. The cables are not reversible. The connector on the end of the cable is specific to the device to which it connects.
-
Power: Starlink power supply input range 100-240VAC (6.3Amax 50-60 Hz) and 12-56VDC (10Amax). For AC-only installation, we recommend using UPS-backed power supply to maintain internet connection through power dips and short power outages. The PSU will prefer AC power if both are available. The Starlink Power Supply supplies power to the dish and allows the data to pass through.
-
Network: Once the dish connects to the Starlink network, it allows the local device to request and be assigned an IP address. This IP will default to a CGNAT IP address unless the "Public IP" option is configured in the dashboard. More information on IP addresses can be found here
-
Multiple Starlinks: If installing multiple Starlinks in one location, the minimum separation distance from the mount center to mount center should be 1 meter (roughly 3 feet). If multiple antennas are installed in close proximity, they should tilt away from each other. A third-party router can be used to connect the Starlinks together into one network and provide load balancing, traffic shaping, failover, and other advanced capabilities.
-
Support: It may take up to 20 minutes for Starlink to connect to the network. If you are having issues with setup, review the guidance in the Troubleshooting and Setup sections in Support. https://support.starlink.com/
Prepare for Install
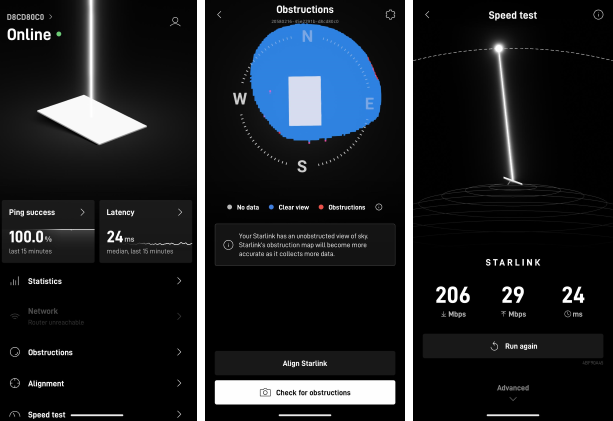
Starlink App
Download the Starlink app first. The app will help you find an unobstructed install location, manage your account, test your connection, and browse the shop.
Select a Location
Find an Unobstructed Location
Starlink must be 100% unobstructed for best performance. Even small obstructions in the field of view will have a negative impact on the quality of the connection, including intermittent outages, dropped packets or sessions, and a reduction in overall average bandwidth capacity.
Each dish should have clear view of the sky from around 20° elevation (above the horizon), with a full 360° azimuth (rotation). If there are obstructions to the field of view, multiple dishes can be used, and load balanced with a 3rd party router. However, any dish with obstructions will result in lower than the rated performance (i.e. bandwidth throughput) from that dish. It is of utmost importance to install in a location with a clear view of the sky.
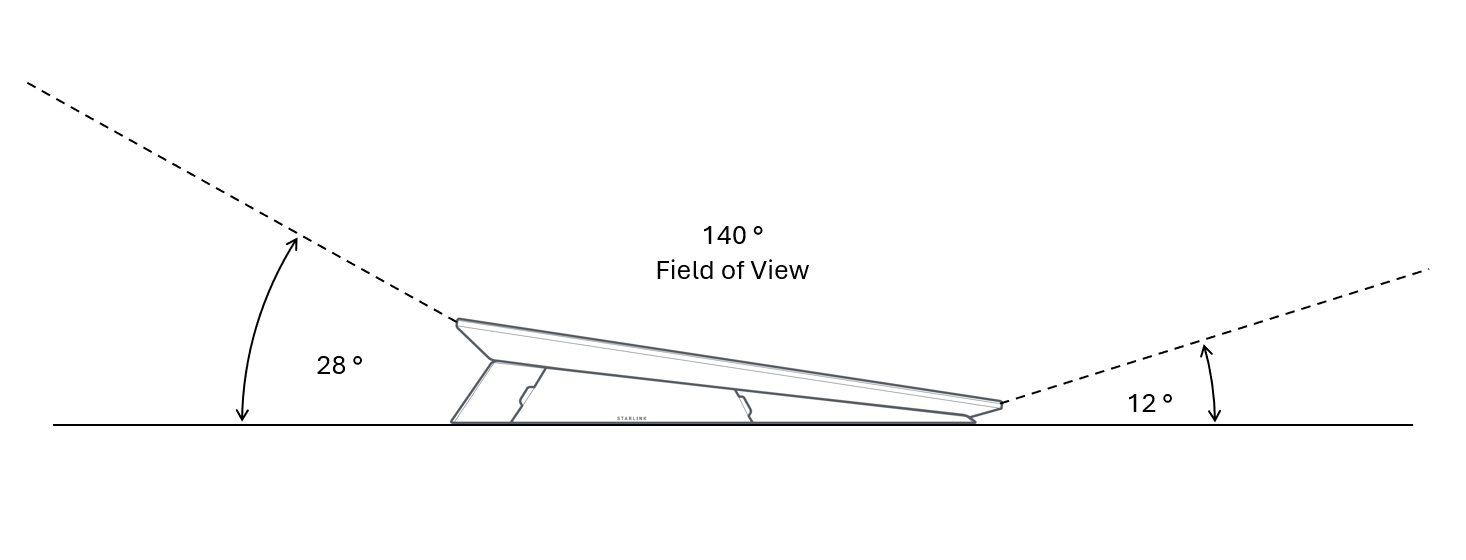
The wedge mount will tilt the dish such that the field of view is 12° at the lower side of the dish, and 28° at the upper side, and roughly 20° on the remaining two sides. If you are installing in an area with minor obstructions, it would be best to tilt the dish away from those obstructions.
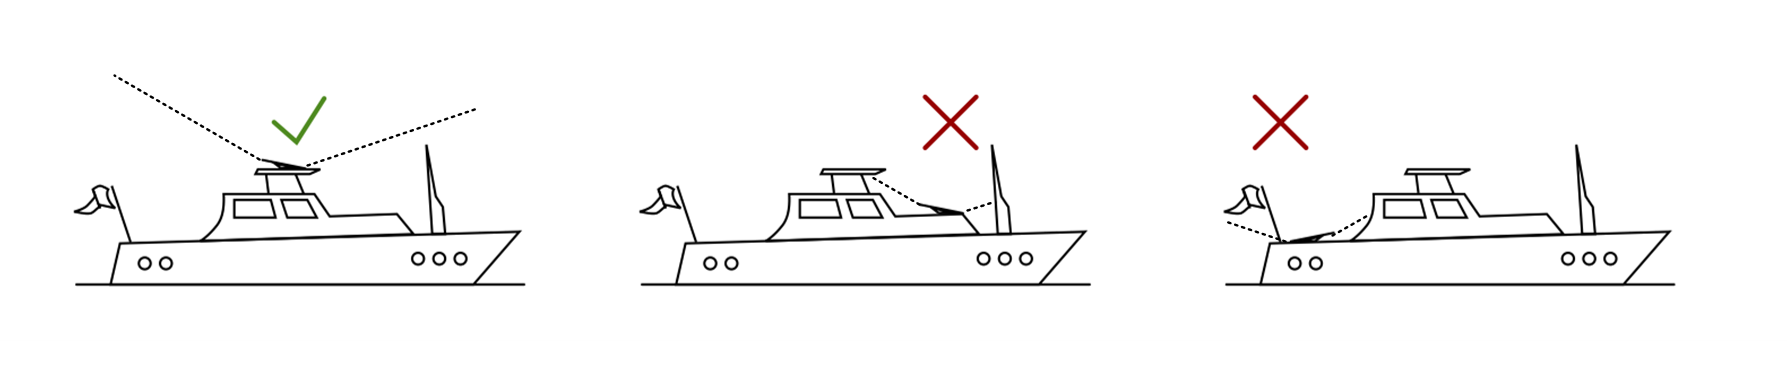
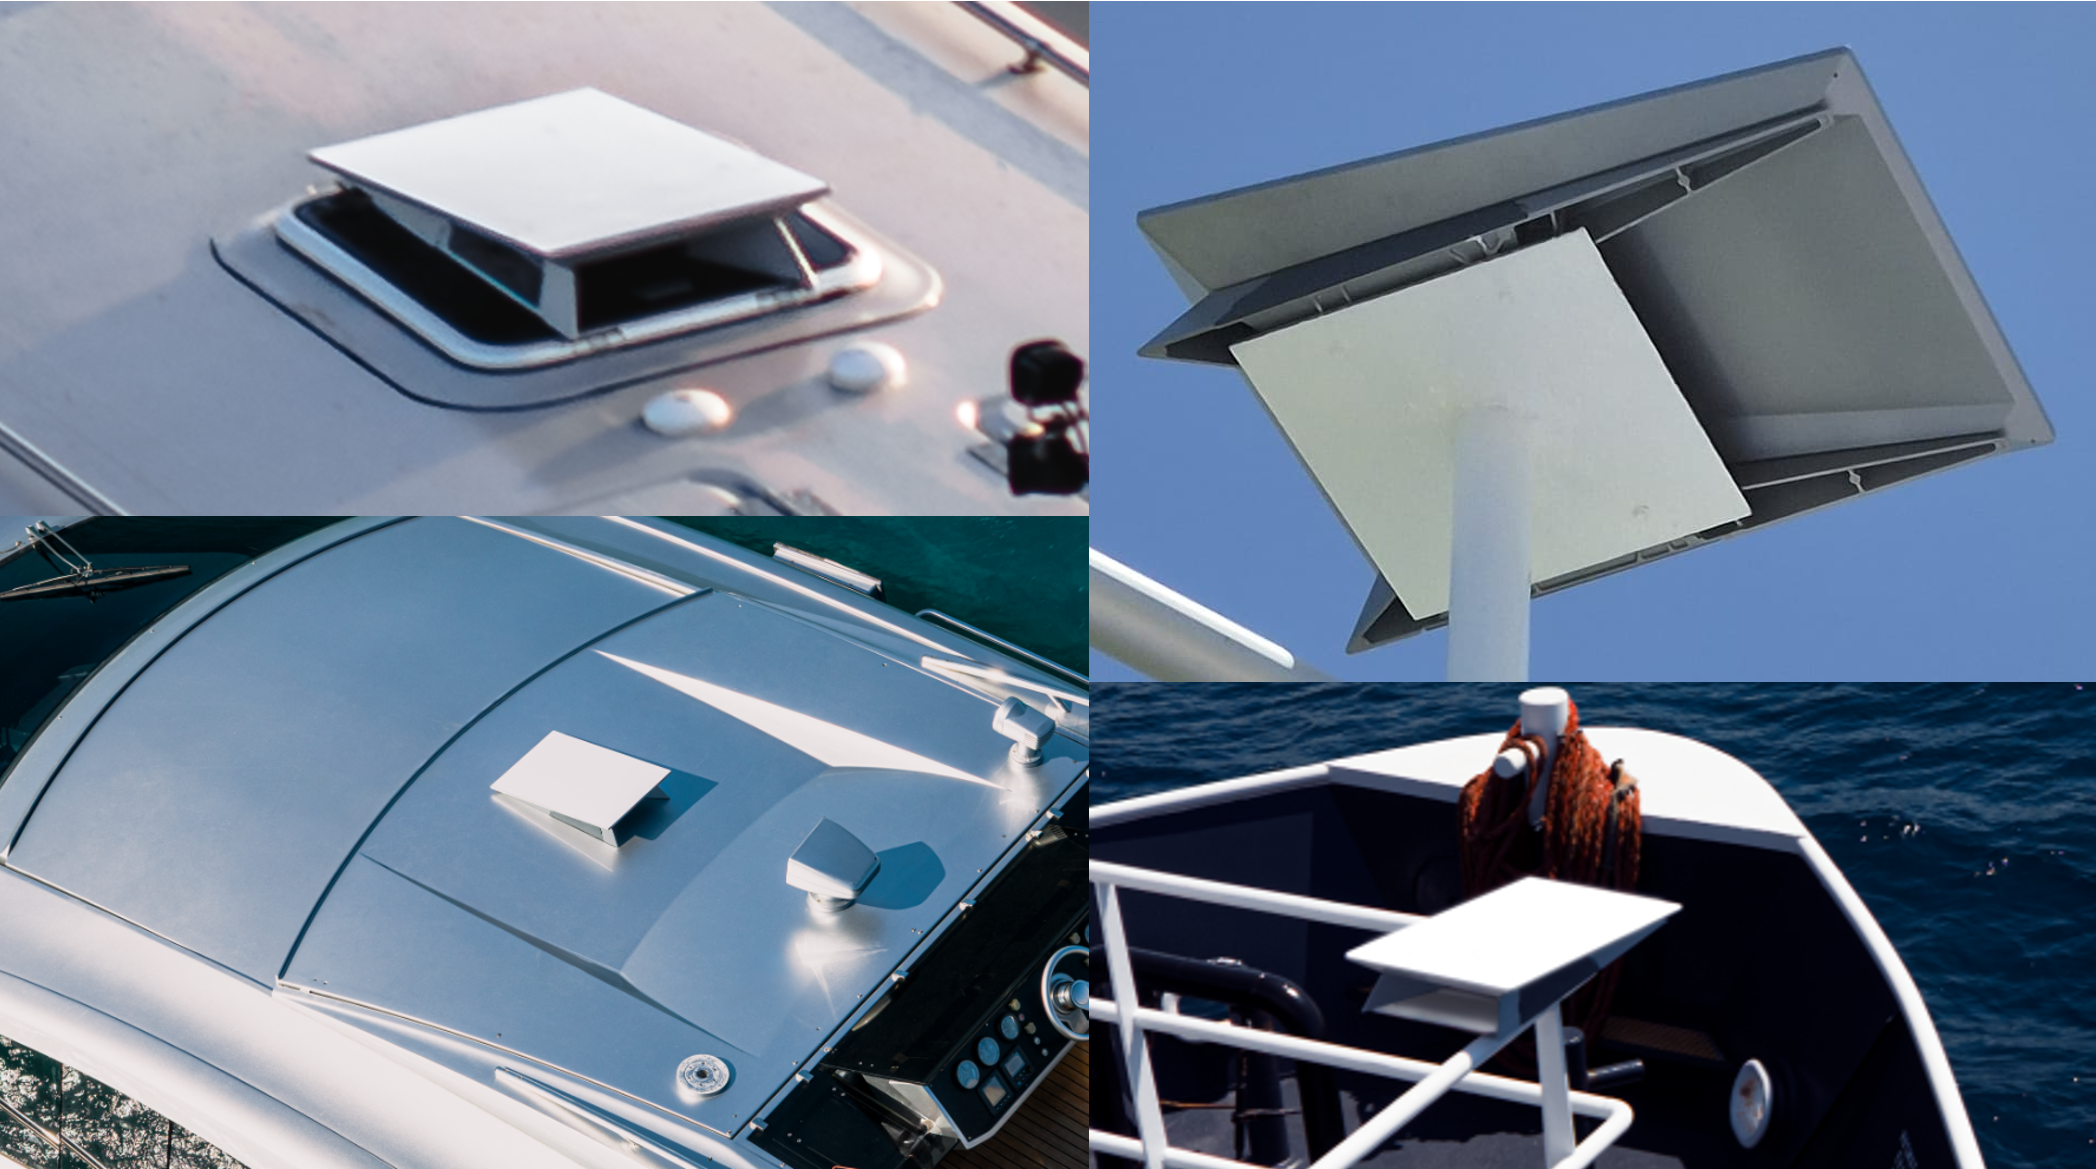
Customers have been successful installing Starlink on masts, railings, elevated posts, and roofs, since the dishes are less likely to be obstructed and are better protected from salt spray.
If your Starlink will not be the tallest object in sight at the install location, be sure to use the Starlink app to ensure no obstructions such as masts, antennas, or other structures will interrupt your service.
Follow these additional guidelines for choosing your best install location:
- Do not install next to a wall or other structure
- Do not install under a covered outdoor area
- Consider an elevated install (for example, on a pedestal, post, or rooftop) as the height improves the chances of clearing nearby obstructions
Use the app to be sure you are assessing obstructions accurately: Use the Obstructions Tool in the App
We should update the Obstructions page to have maritime-related photos (without trees for example)
Hardware Details
Ingress Protection (IP) Rating
The Starlink dish and power supply are water jet and dust resistant and has been shown to survive for long durations (>6 months) in sustained corrosive marine environments (5% NaCl which is standard per ASTM). The Starlink WiFi router is designed for indoor use and is dust and splash resistant. More details on the hardware are available here.
| Part | Code | First Digit - Solid Particles | Second Digit - Liquids |
|---|---|---|---|
| Starlink Dish | IP69K | IP6X - Full protection against dust and other particulates | IPX9 - Protection against high-pressure, high-temperature jet sprays, wash-downs or steam-cleaning procedures. Also tested against extended immersion in water. |
| Starlink Power Supply | IP68 | IP6X - Full protection against dust and other particulates | IPX8 - Protection against powerful water jets. Also tested against extended immersion in water. |
To ensure maximum resistance to water ingress, please be sure the Starlink cable is fully seated before exposing the Starlink to the elements
Sealing Cable Connections
Even if your cable connection is exposed to significant amounts of water, we do not recommend using a sealant to prevent water damage. Only non-setting sealant, like dielectric grease, should be used around the connector.
Cable Details
The Starlink cables are not reversible. In other words, the connector on the end of the cable is specific to the device it connects to. For example, be sure to route the cable with the dish end of the cable at the location of the dish, etc.
There is a MAXIMUM distance of 50 meters from the dish to the PSU. This is due to the voltage requirements at the dish. We do not recommend cutting and splicing this cable. A field-termination kit will be available in early 2026.
Minimum bend radius for any data cable is 5cm (2"). Sharp bends or kinks in the ethernet cables can lower the throughput speed.
Additional Starlink cables are available in the Starlink Shop
Cables are manufactured to the following standards:
Cable Standards
- GENERAL APPLICATION: INDOOR/OUTDOOR, SUNLIGHT RESISTANT
- DATA CATEGORY: 5E
- FLAME RATING: UL: CMX OUTDOOR / CMR, UL 1581 VW-1 / FT1
- TEMPERATURE RATING: 90°C
- OPERATION TEMPERATURE: -40°C TO 90°C
- CONSTRUCTION: 4 TWISTED PAIR, F/UTP
- COMPLIANCE: ROHS, REACH
Installation
Instructions
Follow the instructions located in the Performance Setup Guide
Additional Maritime and Mobility Considerations
Maritime & Mobility applications are best served by the latest Performance Starlink (specifications here). For most applications, we recommend mounting using our Performance Wedge Mount to install the dish at a slight angle. This encourages rain water to run off the dish to prevent accumulation of droplets which would impact performance by blocking the beams to/from the satellite. The Performance Pipe Adapter can also be used in fixed-site or low-speed applications such as cargo vessels. However, for higher-speed vehicles, the Performance Flat Mount will provide a level (horizontal) installation to minimize drag.
Be sure to use removable thread locker (for example Loctite 222) on all threaded fasteners, to prevent the faster from backing out due to vibration. Also placing silicone near the head (between head and mount, and mount and product) to seal out any water. Recommended torque is max 7.5 ft-lbs.
Starlink Mounting Details
Please keep the following in mind when installing your Starlink:
- The mount should be installed on a structurally sound, horizontal surface.
- Use appropriate installation hardware for the installation surface.
- For high speed applications, orient the mount so the lower end of the dish points forwards when in motion.
- For most applications, orient the mount so the lower end of the dish points away from any obstructions, generally towards the nearest outboard side of the ship.
- Do not allow salt water to collect around your Starlink. Periodically check the sealant on your fasteners and rinse with fresh water.
For detailed instructions, reference to the relevant install guide listed below:
- Performance Wedge Mount Install Guide
- Performance Flat Mount Install Guide
- Performance Pipe Adapter Install Guide
Additional Mounting Options
- Our full catalog of accessories is available here and can be ordered through our shop.
- Third party Starlink mounts may be available to suit your specific application.
Power Supply
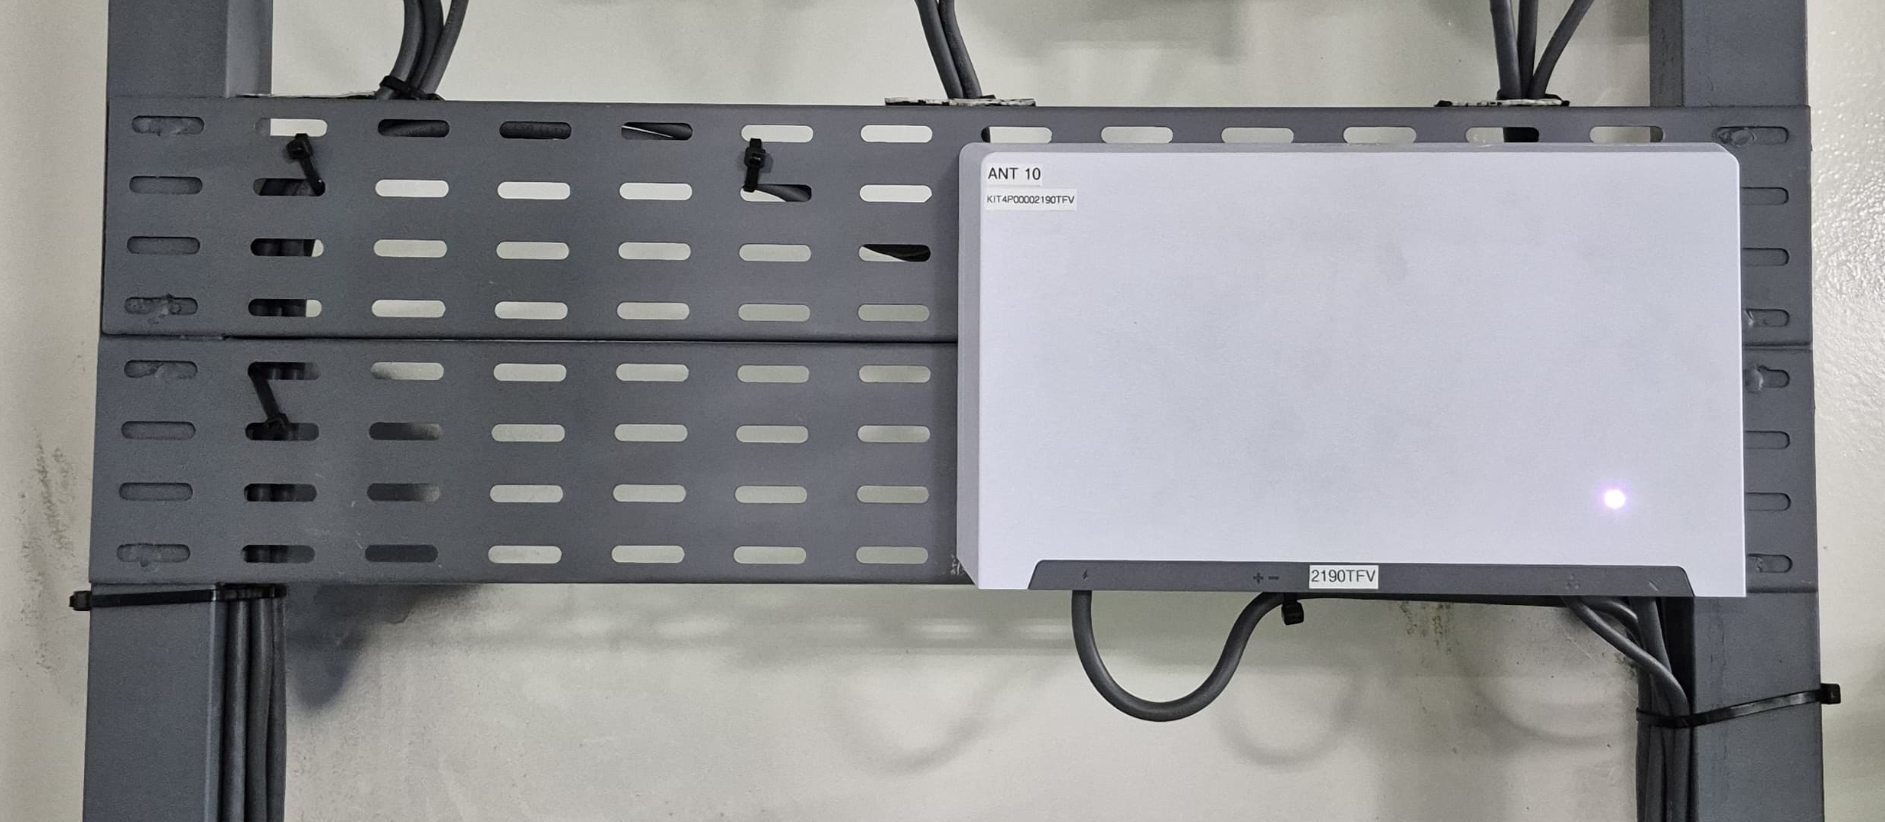
Mount the power supply using the supplied mount. The power supply is rated IP68. However, to prevent water pooling around the connectors, the power supply should be mounted with the connectors at the bottom or the side of the enclosure.
The power supply dissipates approximately 20W of heat and should be mounted in a well-ventilated environment. If it is enclosed be sure to provide a mechanism for the heat to escape. If the power supply over heats it will shut off resulting in a loss of internet connection.
Obstructions
RELEVANT FAQ LINK: https://starlink-enterprise-guide.readme.io/docs/obstructions
Connecting to a Third Party Router
To connect Starlink to an existing Wifi network in your home, business, or vehicle, you need to connect to it via Ethernet to the WAN port on your router.
RELEVANT FAQ LINKS:
- Using a Third Party Router
- Starlink FAQ: Can I add a third-party router or mesh system?
- Starlink FAQ: How do I use the Starlink app with my third-party router?
Installing Multiple Starlinks
Installing and Networking Multiple Starlinks
Connection Monitoring
Maintenance and Troubleshooting
Maintenance and Troubleshooting
Get Support
Additional Resources
- Starlink Dashboard: https://www.starlink.com/account/dashboard
- FAQ and Support: https://support.starlink.com
- Shop: https://shop.starlink.com/
- IP Addresses: https://starlink-enterprise-guide.readme.io/docs/ip-addresses
- Where in the world can I use Starlink? https://www.starlink.com/support/article/9eb841b3-2e43-a6fb-ecc7-ea58fb5600b5
Updated 24 days ago