Multiple Starlinks
Installing Multiple Starlinks
To set up a multi-antenna connection with Starlink, please follow the instructions in this section.
Considerations for installing Multiple Starlinks in close proximity
Before installing multiple Starlink antennas at a location, please review the following considerations:
- Minimize Obstructions: Each Starlink should have a clear view of the sky 20° elevation above the horizon, 360° around the azimuth. You may need to raise the antennas on a pole/pedestal to get a clear view of the sky & good service. If you have obstructions > 20° elevation in any direction, the performance will be negatively affected. An obstructed terminal can be worse for performance than no terminal.
- Minimum separation distance: the minimum separation distance from the mount center to mount center should be 0.9 meters.
- Orientation of the mounts: The mounts are tilted 8° to facilitate water runoff. Ideally, the antennas should be tilted in the direction with the fewest obstructions. If multiple antennas are installed in close proximity, they should tilt away from each other. If they tilt toward each other, it can cause unnecessary interference.
- Orientation of the Dish & Power Supply Unit: Dish & PSU should be set up so that connectors are facing down or to the side. This is to avoid rainwater sitting around the seal.
Then continue with the section on "Networking Multiple Antennas" to learn how to integrate more than one Starlink into your network.
Networking Multiple Antennas
Using the included Wifi
The included Wifi Router can be set up separately with each individual dish using the the same network name (SSID) and password. They will work as separate, independent systems.
The Starlink Mesh feature will not be available. This means that each router/antenna pair will be isolated, and data will not be shared among routers on the internal network. If one antenna loses connection to the network, then the associated Wifi will no longer provide internet.
Your phone or other device will connect to the nearest Wifi Router. This shouldn't cause problems in general, though you may notice that your device sticks to whichever it is connected to even if you move closer to the other router.
Using a third-party router
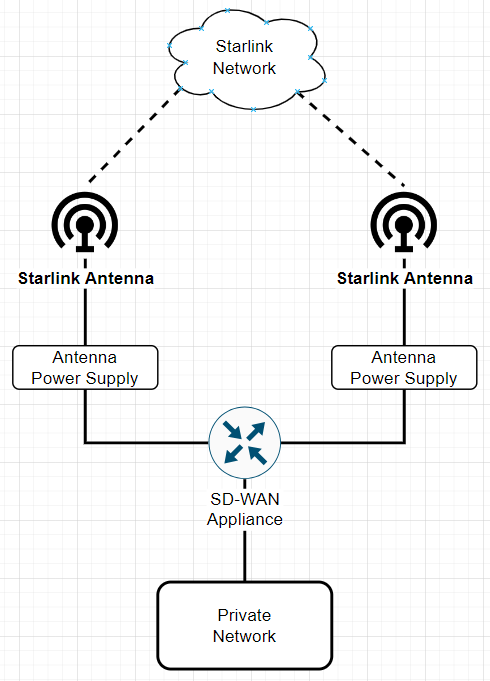
You can use a third-party router appliance to perform advanced networking to interconnect multiple Starlink antennas at a single site. This type of equipment can provide features such as load balancing, failover, link aggregation, IPSEC tunneling, etc. Manufacturers include Peplink, Cisco, Fortigate, Versa, Silverpeak, Aruba, etc.
Network Setup: If you are using SDWAN, please consider the following to optimize performance.
- Load Balancing: Set as even a load balance as possible across all terminals. The ideal algorithm will send a new session to the Starlink with the least used uplink. Utilization should be measured by uplink throughput basis (not sessions, or some other metric).
- Health Checks: Configure heath checks (i.e. pings, etc.) to deal with occasional short-duration outages from Starlink. For example, checking every 10 seconds & getting 5 fails in a row would be a good threshold for flagging the connection as "down".
- Throughput: If there are any obstructions blocking the antenna's view of the sky, then you can expect intermittent interruptions in connectivity. This can result in overall lower throughput for that antenna. Please take this into account when traffic shaping.
- Limitations: Connecting multiple Starlink antennas to a single appliance will increase the total bandwidth available, however performance increases from adding additional antennas do not scale linearly, ie. speeds may not double/triple when adding a second/third UT.
- Performance Measuring: Starlink is an adaptive and constantly moving network. To accurately assess the available bandwidth at a site, customers are encouraged to perform multiple real-world workloads over a 24-hour period. Testing against multiple servers is recommended.

Starlink status
The status of each Starlink antenna can be checked via the App or through your Starlink Dashboard
Updated about 1 month ago
